文章目录
我手上是有一台阿里云服务器,一台内网服务器,想给内网服务器做内网穿透,并使用域名https访问到
搭建的详细步骤官方文档已经很详细了:nps官方文档
这里我记录一下自己的安装过程(使用docker实现)
1、安装docker
首先要有docker,没有的话yum install -y docker
2、服务端(有公网ip的主机)安装nps
2.1 docker拉取镜像:
命令:docker pull ffdfgdfg/nps
查看一下:

2.2 配置conf文件(也可以不配置用默认的,服务端推荐配置)
需要下载一下官方的conf文件然后自己配置成自己的,这里主要是为了把docker里运行的nps的配置文件目录挂载到docker外面,方便修改,如果可以进入容器中修改配置文件的话可以直接启动,不用下配置文件。
GitHub慢的话可以在gitee同步GitHub的镜像里面下:nps镜像站
下载后的配置文件有这些:
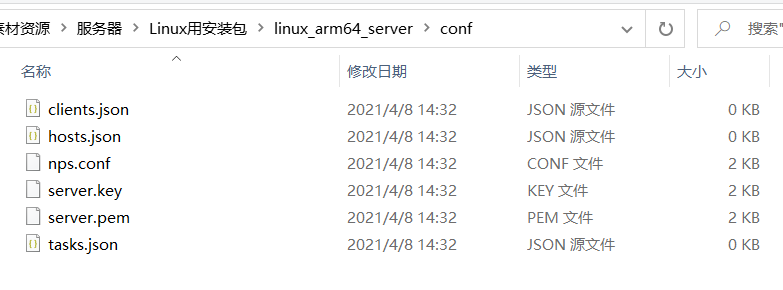
修改其中的nps.conf,主要是一些端口号,我这里是想要通过域名+https访问到,这里官方提供了两种方式:
方式一: 类似于nginx实现https的处理
在配置文件中将https_proxy_port设置为443或者其他你想配置的端口,将https_just_proxy设置为false,nps 重启后,在web管理界面,域名新增或修改界面中修改域名证书和密钥。
此外: 可以在nps.conf中设置一个默认的https配置,当遇到未在web中设置https证书的域名解析时,将自动使用默认证书,另还有一种情况就是对于某些请求的clienthello不携带sni扩展信息,nps也将自动使用默认证书
方式二: 在内网对应服务器上设置https
在nps.conf中将https_just_proxy设置为true,并且打开https_proxy_port端口,然后nps将直接转发https请求到内网服务器上,由内网服务器进行https处理
我这里直接采用方式二
appname = nps
runmode = dev

http_proxy_ip=0.0.0.0
http_proxy_port=20000
https_proxy_port=20001
https_just_proxy=true

https_default_cert_file=conf/server.pem
https_default_key_file=conf/server.key

bridge_type=tcp
bridge_port=20002
bridge_ip=0.0.0.0

public_vkey=123

log_level=7

web_host=a.o.com
web_username=admin
web_password=admin
web_port = 20003
web_ip=0.0.0.0
web_base_url=
web_open_ssl=false
web_cert_file=conf/server.pem
web_key_file=conf/server.key
auth_crypt_key =1234567887654321
allow_user_login=false
allow_user_register=false
allow_user_change_username=false
allow_flow_limit=false
allow_rate_limit=false
allow_tunnel_num_limit=false
allow_local_proxy=false
allow_connection_num_limit=false
allow_multi_ip=false
system_info_display=false
http_cache=false
http_cache_length=100
http_add_origin_header=false
配置文件(/etc/nps/conf/nps.conf)的含义:
| 名称 | 含义 |
|---|---|
| web_port | web管理端口 |
| web_password | web界面管理密码 |
| web_username | web界面管理账号 |
| web_base_url | web管理主路径,用于将web管理置于代理子路径后面 |
| bridge_port | 服务端客户端通信端口 |
| https_proxy_port | 域名代理https代理监听端口 |
| http_proxy_port | 域名代理http代理监听端口 |
| auth_key | web api密钥 |
| bridge_type | 客户端与服务端连接方式kcp或tcp |
| public_vkey | 客户端以配置文件模式启动时的密钥,设置为空表示关闭客户端配置文件连接模式 |
| ip_limit | 是否限制ip访问,true或false或忽略 |
| flow_store_interval | 服务端流量数据持久化间隔,单位分钟,忽略表示不持久化 |
| log_level | 日志输出级别 |
| auth_crypt_key | 获取服务端authKey时的aes加密密钥,16位 |
| p2p_ip | 服务端Ip,使用p2p模式必填 |
| p2p_port | p2p模式开启的udp端口 |
| pprof_ip | debug pprof 服务端ip |
| pprof_port | debug pprof 端口 |
| disconnect_timeout | 客户端连接超时,单位 5s,默认值 60,即 300s = 5mins |
2.3 docker跑一个nps实例(有配置文件)
自己挂载了外部配置文件:
docker run -d --name nps --net=host -v <本机conf目录>:/conf ffdfgdfg/nps参数解释一下:
-d后台运行,–name给当前镜像起一个名字 -v挂载目录(将docker外的目录映射到docker内的目录,这样就读外面的了)
我是在
/root/nps/conf这个目录下放了配置文件,所以我的命令就是:docker run -d -p 20000-20010:20000-20010 -v /root/nps/conf:/conf --name=nps ffdfgdfg/nps没有挂载外部配置文件(用容器内的)
官方:
docker run -d --name nps --net=host ffdfgdfg/nps我的命令是:
docker run --net=host --name nps-server -d ffdfgdfg/nps
在阿里的防火墙记得也要打开指定端口
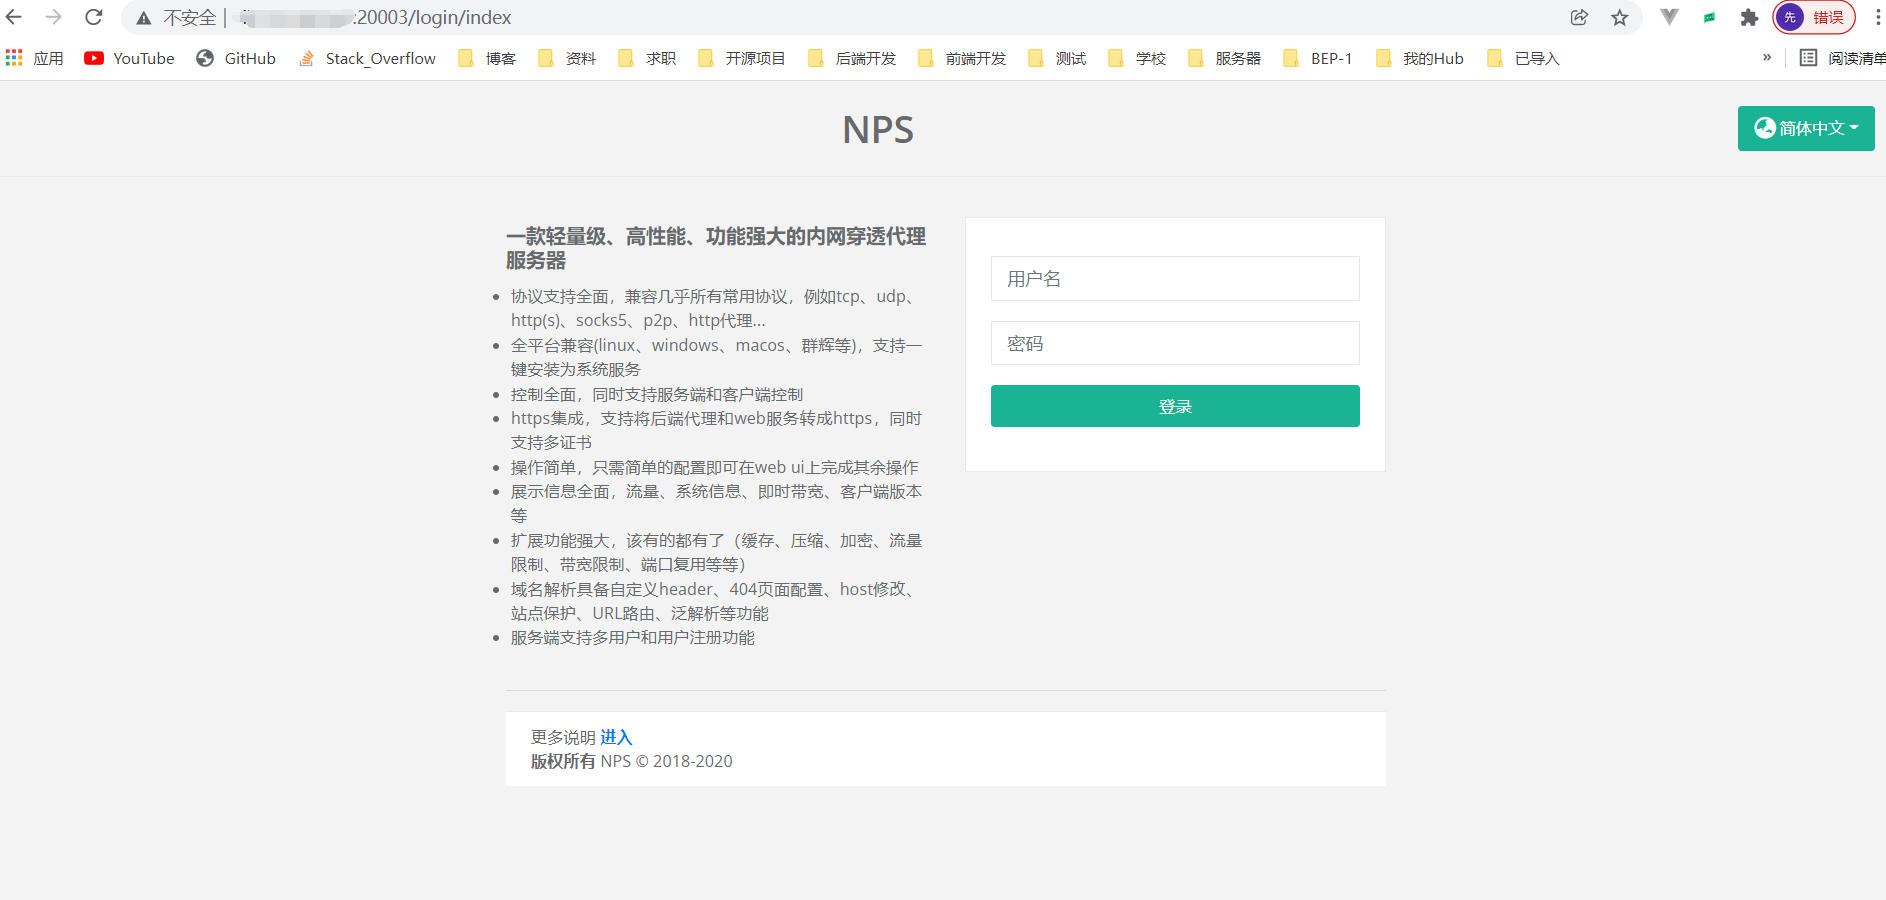
然后就可以访问到web界面了(配置了配置文件的):
2.4 docker跑一个nps实例(无配置文件)
用默认配置的话就异常方便了,直接命令:
docker run --net=host --name nps_server -d ffdfgdfg/nps
然后就可以访问页面了(默认端口8024)
3、客户端(内网ip主机)安装npc
3.1 docker拉取镜像
注意这里拉取的是npc,不是nps
docker pull ffdfgdfg/npc
查看一下:

3.2 配置配置文件(不配置配置文件更方便,客户端推荐不配置)
[common]
server_addr=1.1.1.1:8024
conn_type=tcp
vkey=123
username=111
password=222
compress=true
crypt=true
rate_limit=10000
flow_limit=100
remark=test
max_conn=10
#pprof_addr=0.0.0.0:9999
参数解释:
| 项 | 含义 |
|---|---|
| server_addr | 服务端ip/域名:port |
| conn_type | 与服务端通信模式(tcp或kcp) |
| vkey | 服务端配置文件中的密钥(非web) |
| username | socks5或http(s)密码保护用户名(可忽略) |
| password | socks5或http(s)密码保护密码(可忽略) |
| compress | 是否压缩传输(true或false或忽略) |
| crypt | 是否加密传输(true或false或忽略) |
| rate_limit | 速度限制,可忽略 |
| flow_limit | 流量限制,可忽略 |
| remark | 客户端备注,可忽略 |
| max_conn | 最大连接数,可忽略 |
| pprof_addr | debug pprof ip:port |
我这里实现想通过域名+https到访问内网主机的8080端口,所以我的配置文件是这样的:
[common]
server_addr=域名:20002
conn_type=https
vkey=123
auto_reconnection=true
max_conn=1000
flow_limit=1000
rate_limit=1000
basic_username=11
basic_password=3
web_username=user
web_password=1234
crypt=true
compress=true
#pprof_addr=0.0.0.0:9999
disconnect_timeout=60

[health_check_test1]
health_check_timeout=1
health_check_max_failed=3
health_check_interval=1
health_http_url=/
health_check_type=http
health_check_target=127.0.0.1:8083,127.0.0.1:8082

[health_check_test2]
health_check_timeout=1
health_check_max_failed=3
health_check_interval=1
health_check_type=tcp
health_check_target=127.0.0.1:8083,127.0.0.1:8082

[web]
host=域名
target_addr=127.0.0.1:8080
3.3 docker启动一个镜像实例(有配置文件)
同样在外面创建一个文件映射的地址
命令:
docker run -d -p 18080-18090:8080-8090 -v /root/npc/conf:/conf --name=npc ffdfgdfg/npc
3.4 docker启动一个镜像实例(无配置文件,推荐,异常方便)
首先我们要在我们的网页上配置一下(可以不配置直接新增):
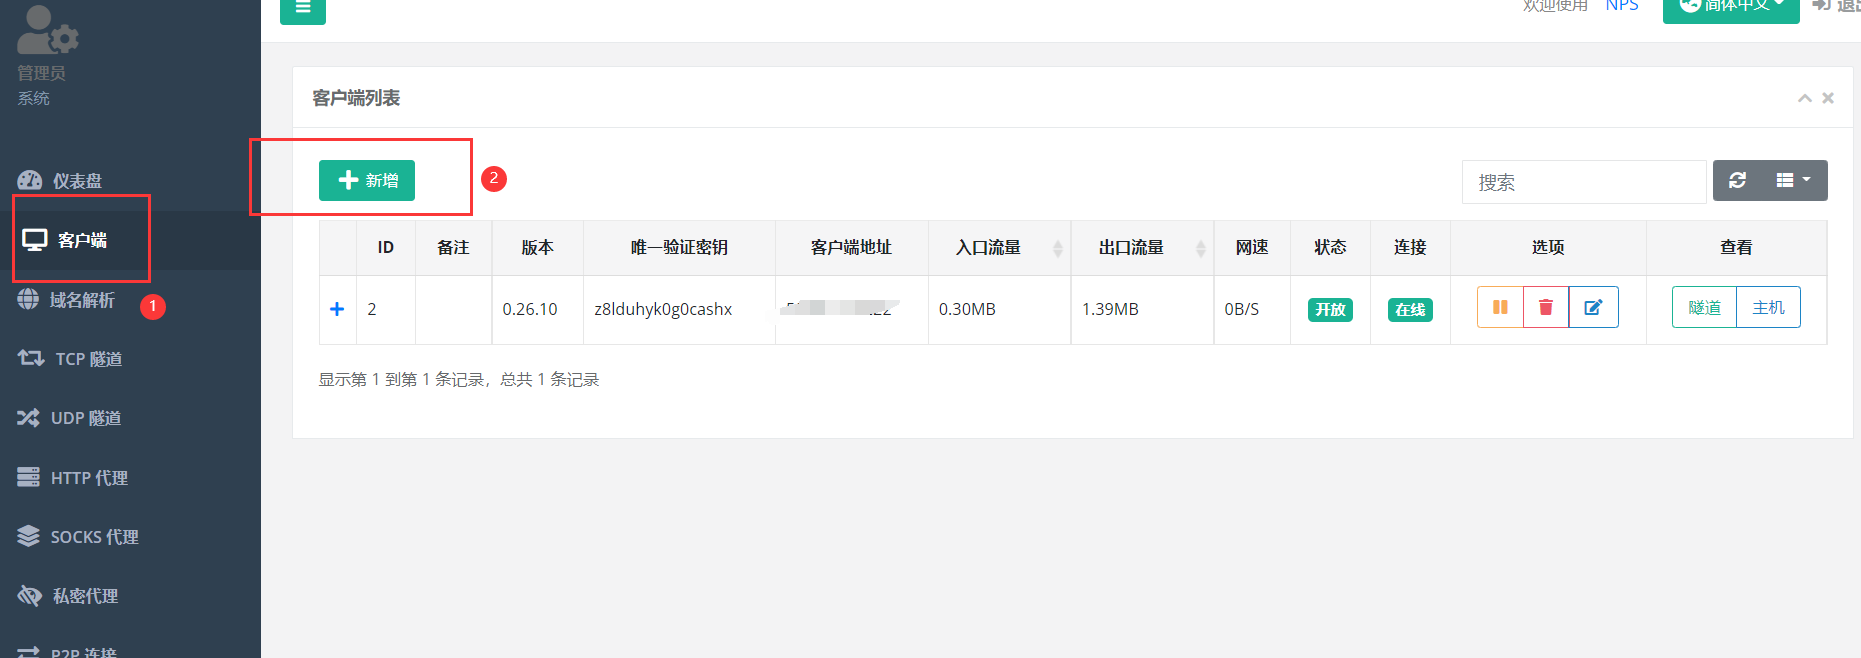
拿到客户端命令:
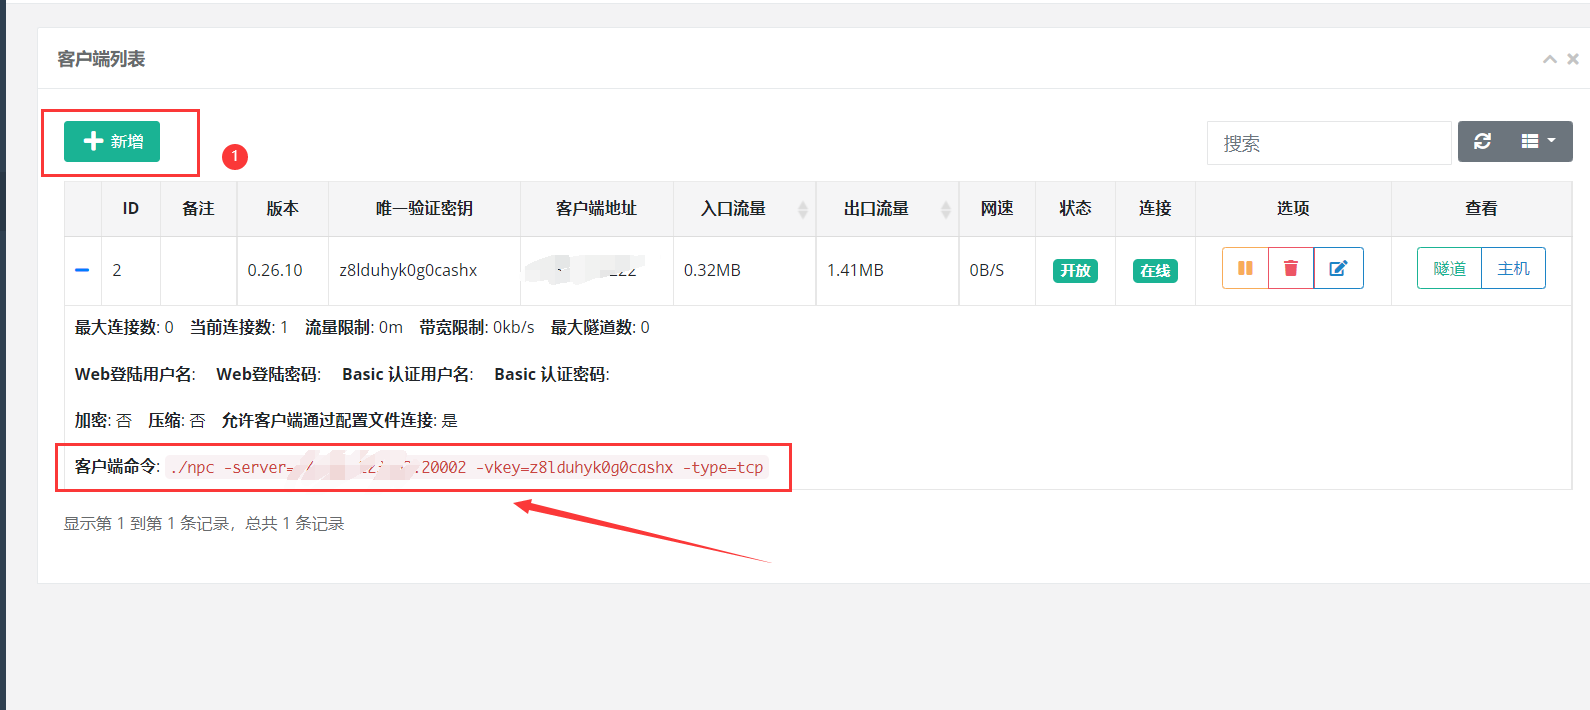
然后就可以在客户端上用docker创建一个实例:
docker run -d --name npc --net=host ffdfgdfg/npc -server=ip地址:20002 -vkey=z8lduhyk0g0cashx -type=tcp
接下来你就可以看到你的客户端上线了:

4、配置内网穿透
这里有几个点需要注意:
- 域名解析不能配置端口号,且只能解析到你配置好的http端口和https端口
- 只要在内网主机上做好了https,可以直接用
TCP,很方便
像这样:

然后就可以直接访问了!!!!!!!!
